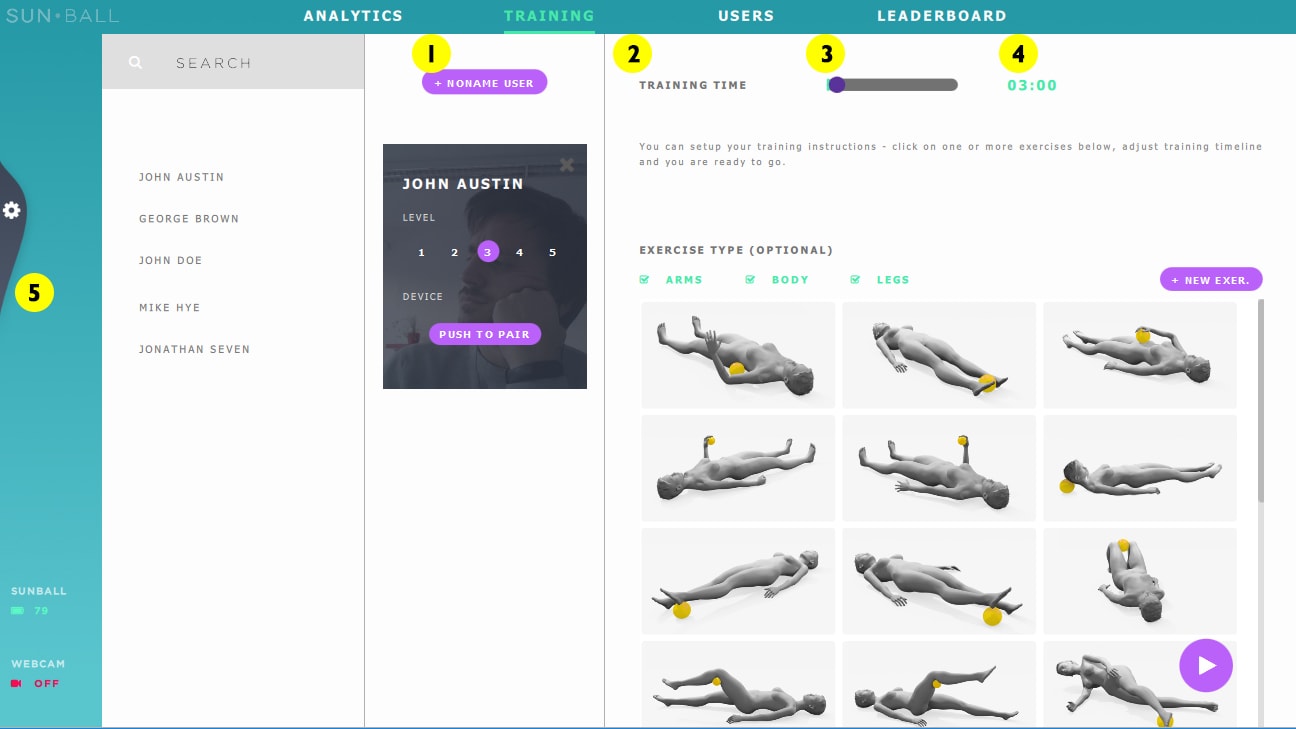
The entire application consists of 5 main parts (analytics [1], training [2], users [3], leaderboard [4]) - switching tabs at the top of the screen.
Application settings [5], including connection of SunBall to the application runs in the sliding menu on the left part of the screen.
Basic Settings
In the left drop-down menu, using the first item, connect to SunBall Hub with the application. Click on the text SunBall with signal strength indicator and wait few seconds. Once connected SunApp displays two sliders for setting the pressures of both balloons.
For successful connection, SunBall needs to be charged and USB dongle connected to your PC. For more info, see Troubleshooting.
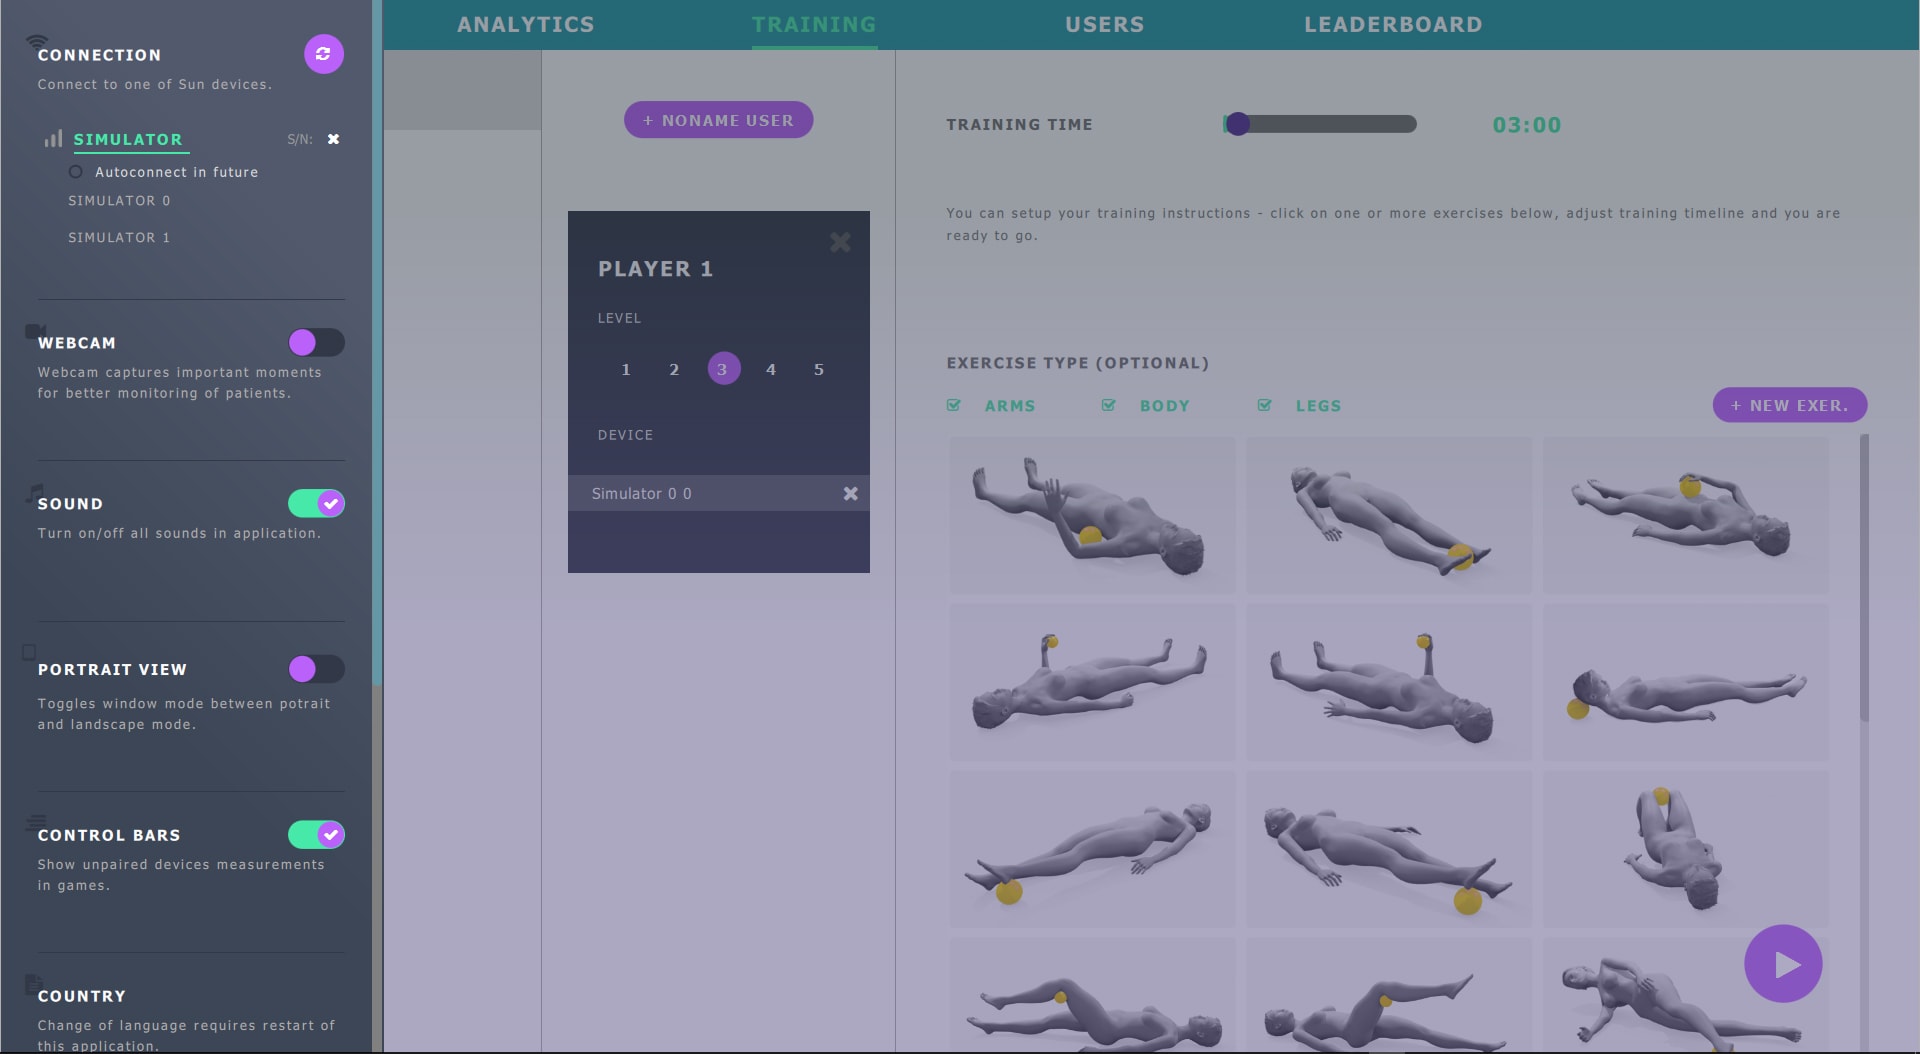
Inflation of balls may last 20-30 seconds and it can also occur during gameplay or any other time. The pressure in the balloons, which is a crucial element for controlling the system, is kept stable this way by SunBall Hub.
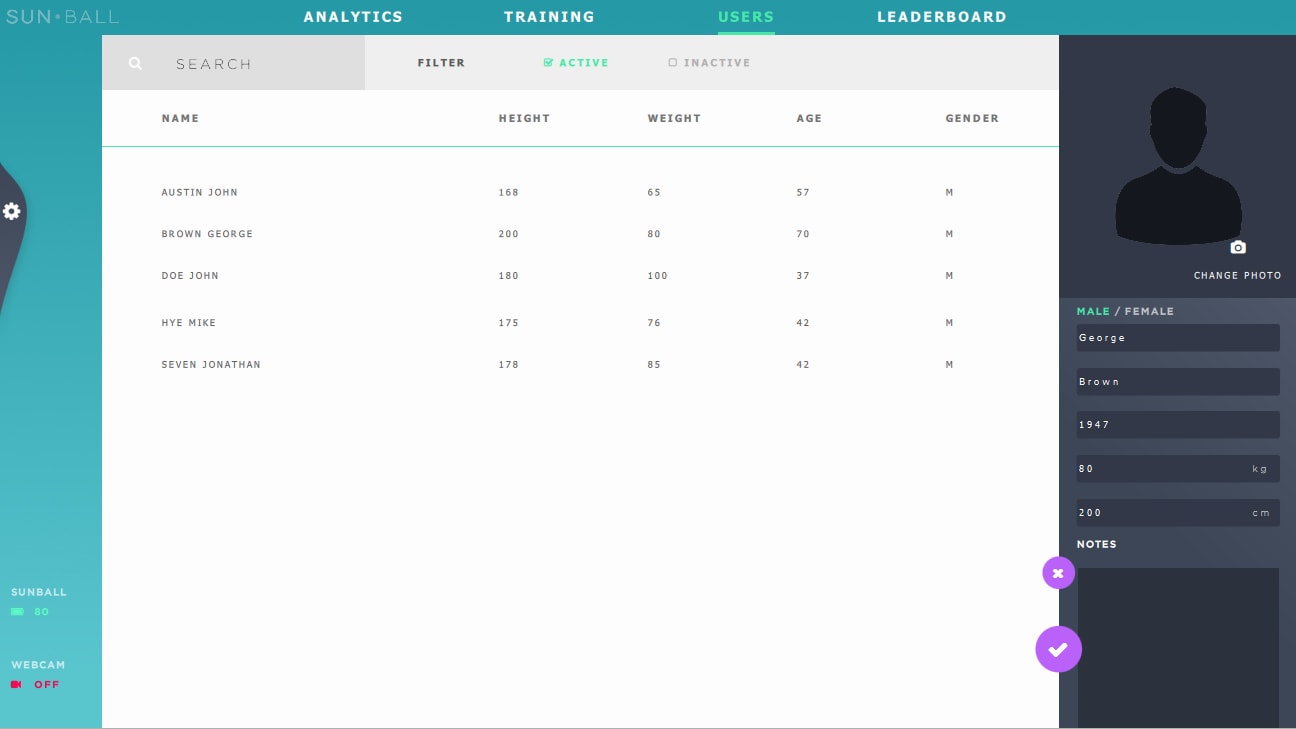
Users
In section “Users”, it is possible to create new and edit existing users. Settings should be self-explanatory. Search and filter can help you navigate through users more easily
You can annotate and create notes to every user, save their profile photo, set basic biometric parameters or disable them if they are inactive for a long time.
Don't worry, disable won't delete user and her data - it just hides the user from list of active users so that lists are not so overcrowded.
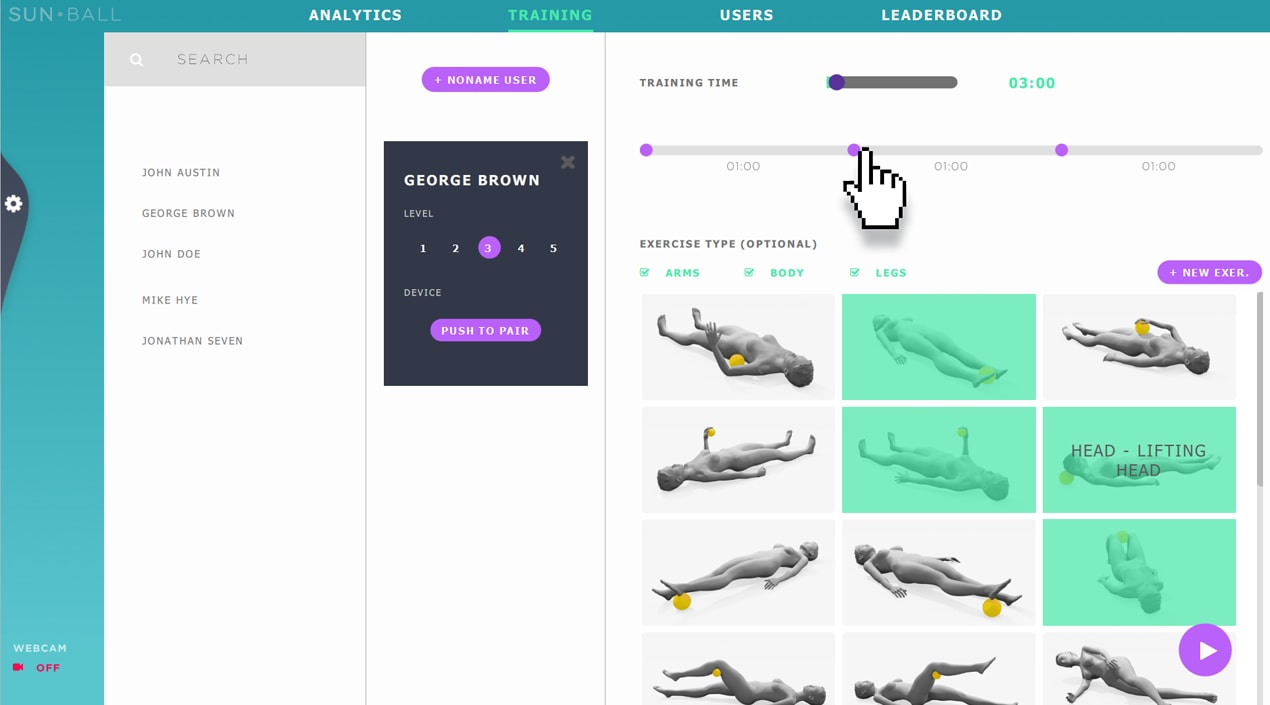
Training
Once you are connected to SunBall and everything is hooked up, you can proceed to training setup where we need to assign users to training session, pair them with exercise balls, optionally create a set of exercises and select desired game.
It's as easy as it can be. At minimum, it takes 4 clicks and 15s to start playing a game. Once you set it up few times, SunApp becomes frictionless.
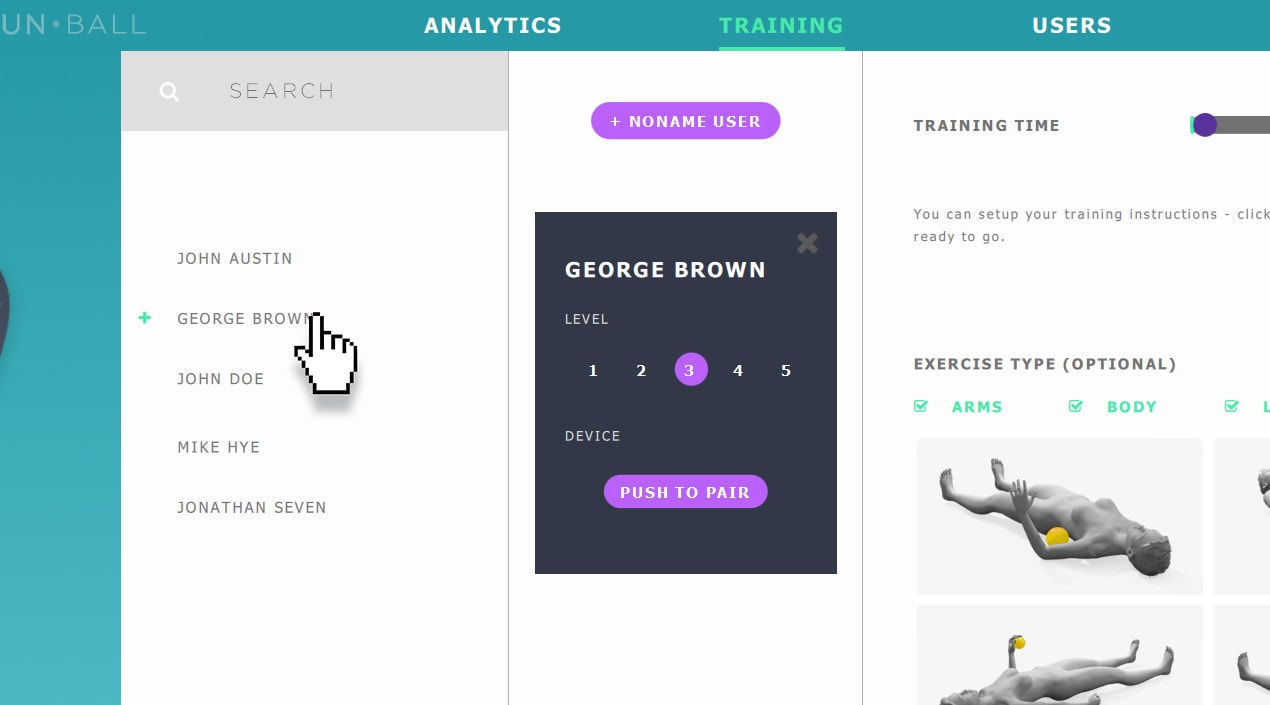
Select players
Players' level
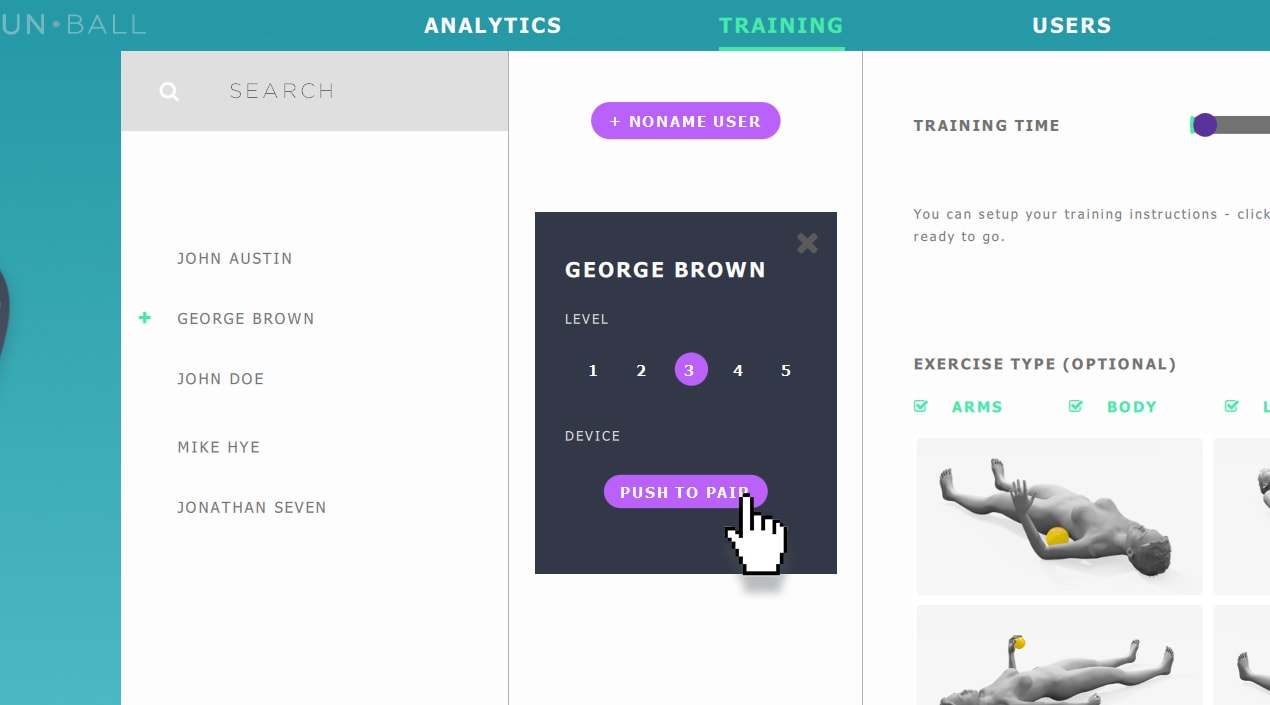
Pair devices
- Click the button „Push to pair“
- Start squeezing the ball you want to pair with
- You should see pressure bar inside player box after successful pairing
Training time
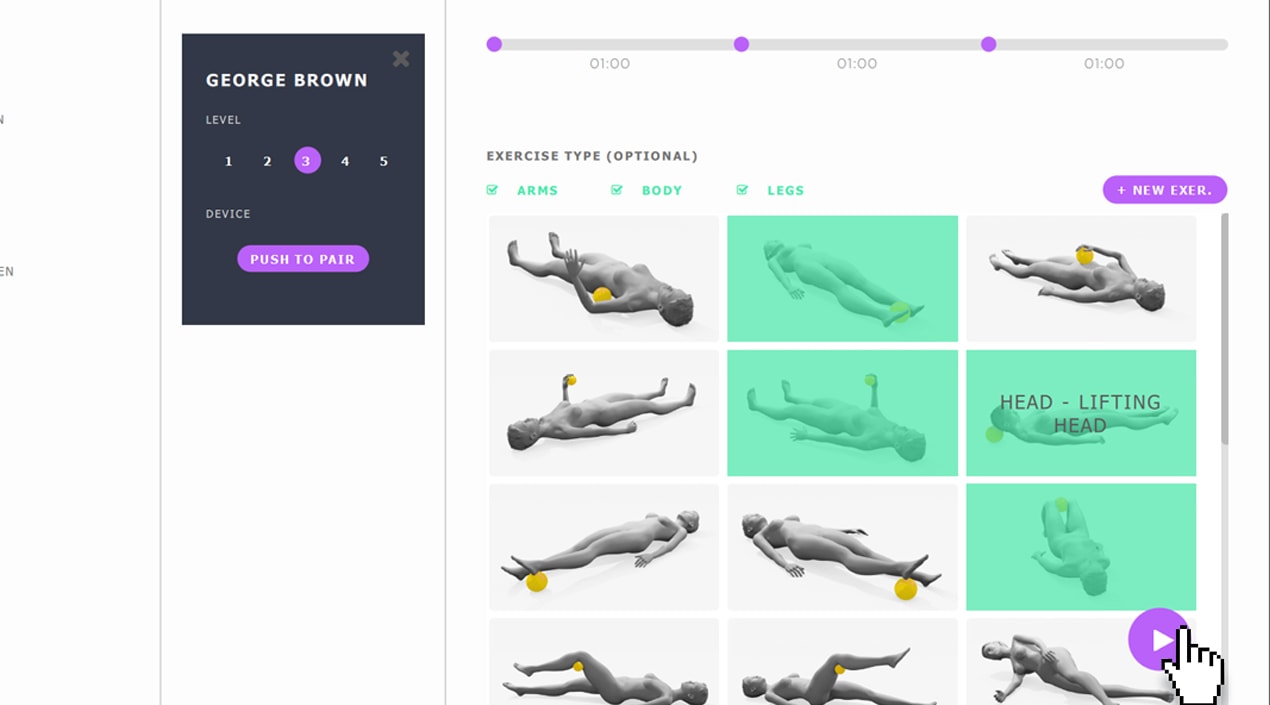
Set of exercises
Adjust timeline
Play games
If you have already added users to SunApp, you can select one or more users from the list on the left side.
In case you don’t want to play with a specific user, you can add "Noname user”. Noname user is an empty virtual user which does not save gameplay data to analytics. It’s used when therapist needs to show something in game to patient and doesn’t want to save data during the process.
Level number adjusts sensitivity of ball pressure. Lower the level is, the more easier and sensitive is to move in games and vice versa.
(1 weak ---- 5 strong player)
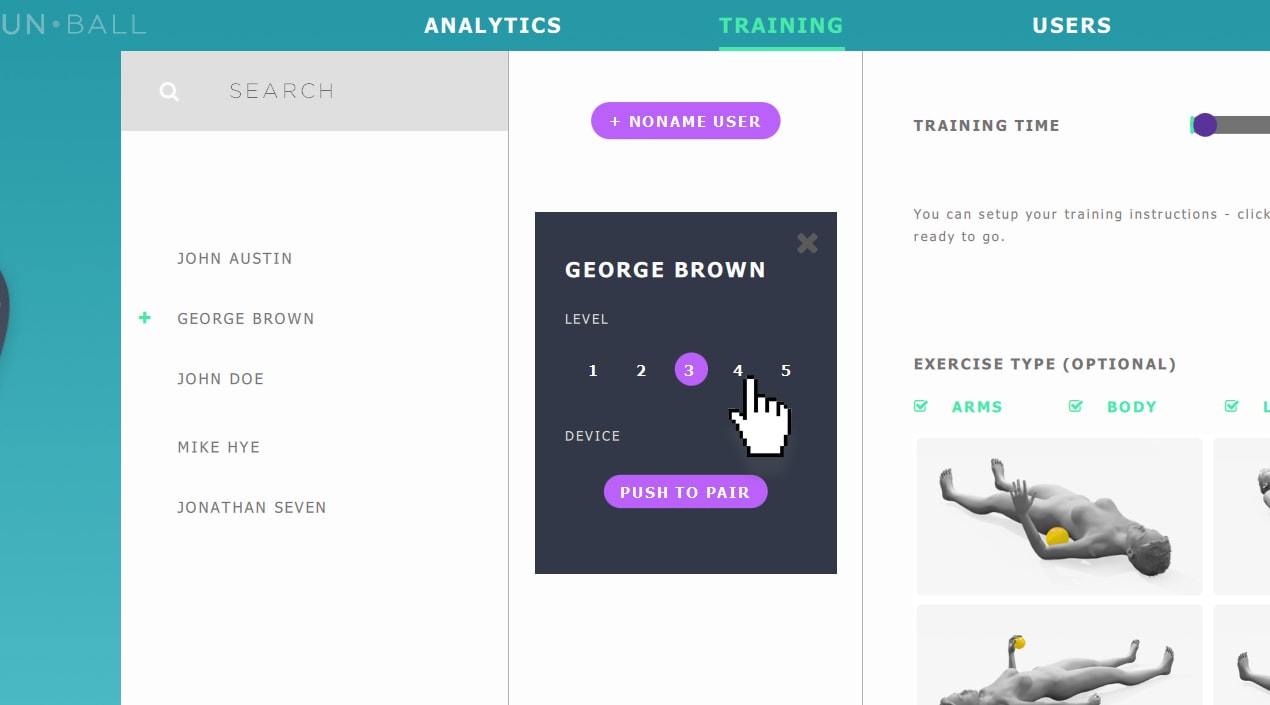
Application needs to know which ball is the patient using therefore an easy device pairing is required.
Adjust training time according to your needs.
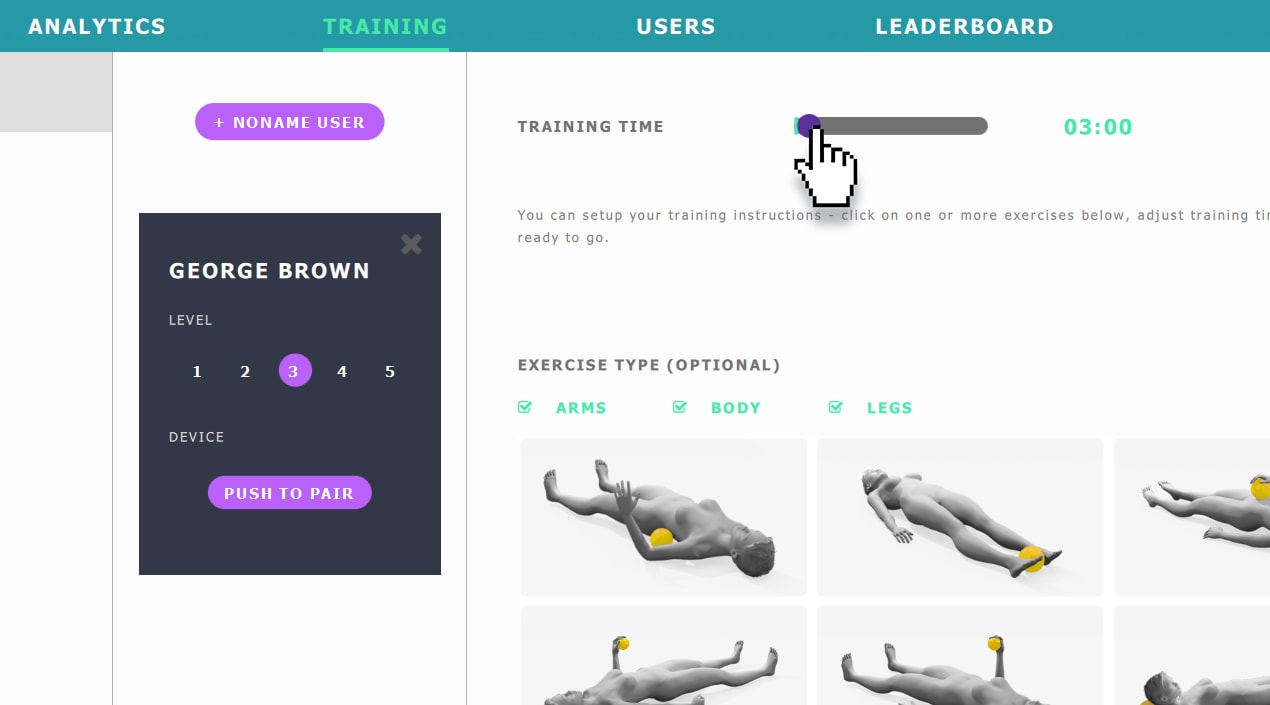
Selection of exercises from provided database is an optional step. In case of some exercises being selected they will instruct patients during gameplay.
Default database was created in cooperation with hospitals and therapists to meet needs of broad spectrum of users. More about exercises.
Selected exercises then instruct patient during whole training without need of intervention of specialized personal. You can also edit and create your own set exercises.
Do you want to use your own exercises? Learn more about exercise editor here.
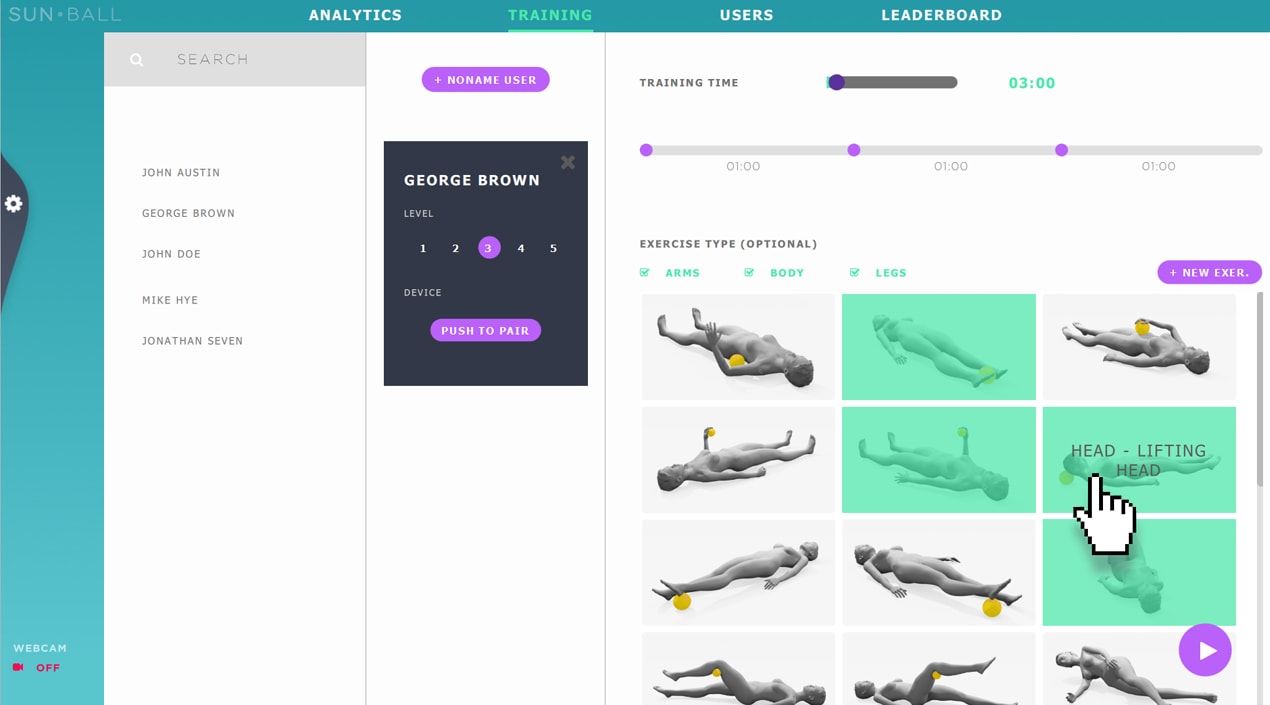
By default, exercises are distributed uniformly. If you want to spend more time on a particular exercise, adjust the length of desired exercises using the slider points along the timeline.
That’s it, no more settings. You only need to select a game and start training/playing. Click the 'play' button at the bottom right and select one of the games. For more information about Games, see this section.
Applications also offers other advanced settings, which is able to simplify and streamline work in SunApp. See the section Advanced Settings.